

 Skip to content
 This guide walks you through everything you need to know how to clean Delonghi Nespresso machine properly, from descaling to milk frothier maintenance. Whether you’re a casual coffee drinker or a daily espresso enthusiast, these steps will help you preserve flavor, extend your machine’s lifespan, and avoid costly repairs.
Your De’Longhi Nespresso coffee machine is more than just a kitchen appliance, it’s your daily ritual, your morning motivator, and your gateway to café-quality espresso at home. But like any precision device, it needs regular care to perform at its best. A clean machine means better coffee. Over time, mineral deposits from hard water, coffee oils, and milk residue accumulate inside your machine. This buildup can:
– Alter the taste of your coffee
– Slow down brewing time
– Cause blockages and leaks
– Damage internal components
In Dubai and Abu Dhabi, hard water accelerates limescale buildup, making regular descaling even more critical. Cleaning your machine monthly—and descaling every 2–3 months—keeps it running smoothly and ensures every cup tastes fresh.
Before you begin, gather these supplies:
– Delonghi-approved descaling solution or white vinegar
– Mild dish soap
– Soft cloths or microfiber towels
– Small brush (e.g., toothbrush)
– Container to catch water during cleaning
– Warm water
Make sure your machine is turned off and unplugged before starting.
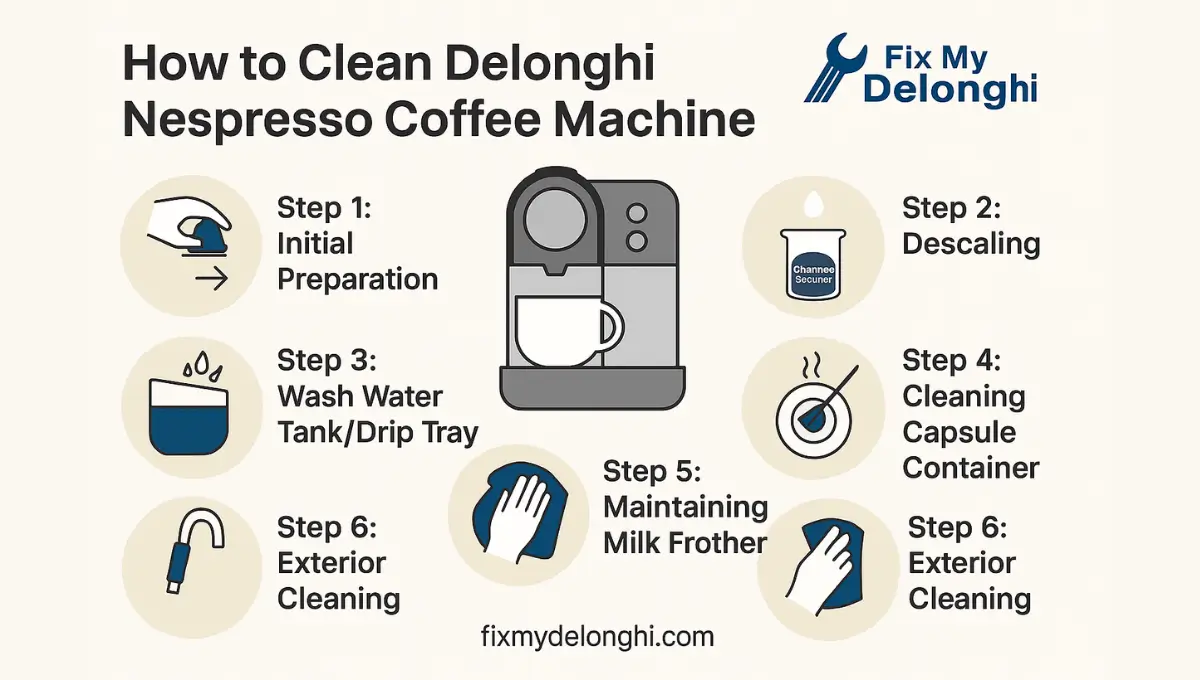
Start by removing and rinsing all detachable components:
This step clears out surface-level grime and prepares the machine for deeper cleaning.
Descaling is crucial to remove mineral buildup inside the heating element and water lines.
These parts are often overlooked but can harbor bacteria and mold.
– Wash the water tank with mild soap and rinse thoroughly.
– Scrub the drip tray and drainage holes with a brush.
– Dry both parts completely before reassembling.
Avoid reassembling wet components—they can promote mold growth and affect taste.
Coffee grounds and moisture can clog the capsule area and brewing chamber.
– Remove the capsule container and brush away any grounds.
– Wipe the capsule piercing unit and brewing area with a damp cloth.
– Use a soft brush to clean tight spaces.
– Run a water-only cycle to rinse the internal system after reassembly.
This ensures smooth capsule insertion and consistent brewing pressure.
Milk residue is notorious for clogging frother nozzles and affecting foam quality.
🧊 For automatic frothier, run a steam-only cycle daily to prevent buildup.
Keep your machine looking as good as it performs:
– Wipe the exterior with a damp microfiber cloth.
– Clean buttons and display panels gently.
– Check for any cracks or discoloration in parts.
– Replace worn-out components to maintain hygiene and performance.
✅ Use filtered or bottled water to reduce mineral deposits
✅ Empty the capsule container daily to prevent odors
✅ Clean the milk frother after every use
✅ Schedule monthly deep cleans and quarterly descaling
✅ Don’t ignore strange noises or leaks—they’re early warning signs
These habits help you avoid breakdowns and keep your machine brewing like new.
If your machine shows signs of malfunction—like leaks, error codes, or poor heating—even after cleaning, it’s time to call in professionals. DIY fixes can void your warranty or worsen the issue.
Fix My Delonghi offers expert servicing for Delonghi Nespresso machines across Dubai and Abu Dhabi. Our technicians are trained to handle everything from deep cleaning to pump replacements and electronic diagnostics.
We’re not just repair experts—we’re coffee lovers who understand the importance of a perfect brew. Our services include:
– Professional descaling and internal cleaning
– Diagnosis and repair of mechanical and electrical issues
– Replacement of worn-out parts with genuine Delonghi components
– Fast, transparent service with no hidden fees
– On-site support across Dubai and Abu Dhabi
Whether your machine needs a tune-up or a full overhaul, we’ve got you covered.
 Optimized by Seraphinite Accelerator